Friday 11 November 2016

Making Mistakes on Purpose when learning to Code

Within my school board (Trillium Lakelands District School Board) we have taken on a board-wide coding initiative. Last year, one junior classroom (grade 4-6) from each school within our board was part of the coding initiative.

Part of the initiative was going into classrooms and working with classes and teaching some basics of coding. Often, when guiding some beginners in coding (outside of a environment like code.org), it can be easy to fall into a live guided coding session. It can be hard to get students to think about what they are doing when they are following a guided lesson.

A strategy to get students to engage in some thinking, is to purposely guide them to make a mistake and then have them think about why something is or is not happening the way that that they expected. For example, in our first lesson, I will start by having students start with a  and I have students click on it several times to see what happens. I then ask students to try to figure out how to make the sprite move forwards and then backwards, by using the same block BUT change something about the number. Students eventually suggest making the block 
and then they connect the two blocks togetherAND..... nothing happens. The next step of asking students  "WHY" is when you can start to engage student's thinking skills ~ the purpose of coding (not just following a teacher as they follow along). An easy way to solve the about issue, once experienced, is to add in a "play sound.." or a "wait <> seconds" block to slow down the process and allow the movement to be seen.

Another example of purposeful mistakes in coding is in an activity where you code 2D shapes. First start by brainstorming the characteristics of a square. Students will likely say: 4 sides, 4 corners, all sides the same length, 90 degree angle corners...etc. Work together with students to code the drawing of a square. Your code may look like:

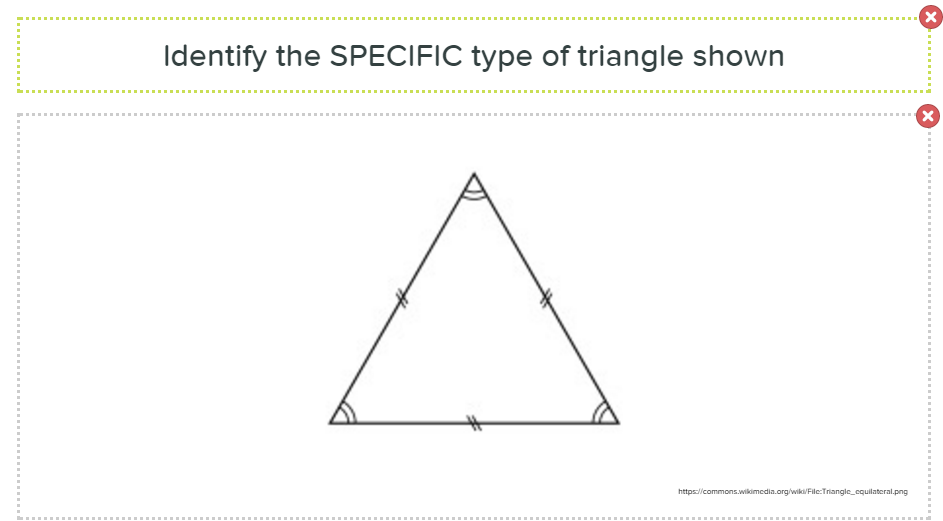
Now ask students to brainstorm the characteristics of an equilateral triangle. Likely they will say that it will have 3 equal sides, 3 angles and the angles are 60 degrees. Use that information to code the triangle. Let students take the lead in changing the code. Don't guide as much through this. Once they run their code, it will likely look and perform like this:
Now this thinking can start. Consider having a couple triangles taped to the floor and have students physically walk the triangle. They should realize through visualization and observation, that they are turning much more than 60 degrees. Discuss that 60 degrees is the interior angle of the triangle, and when they code the movement for drawing, they need to use the exterior angles. The formula for determining the exterior angles for a regular shape is 360 degrees divided by the number of sides (as explained here).

Mistakes are a huge part of learning. Help foster strong thinking skills in our students by allowing them to make mistakes (even if on purpose), and then work through them. Coding is about thinking, not just following recipes.

Thursday 21 July 2016

Computational Thinking - Logic Flow Diagramming

In discussing "coding", a lot is made of "computational thinking". A useful activity to develop computational thinking with students is Logic Flow Diagramming of regular or daily activities. In sharing this idea, I will use the "Minds-On", "Action", and "Consolidate" lesson framework to explain/share this idea.

Minds-On:

Have students (using THINK-PAIR-SHARE) brainstorm regular activities in their live that they do on a regular basis and are usually very repetitive. Some examples include: brushing teeth, getting dressed, making cereal.

Action:

Share with students the symbols of Logic Flow Diagramming. An example includes:


Next share with students this example of a logic flow diagram of using a lamp:


This example draws out the usage of the diagram, and how to break down simple daily decision making or tasks into their individual steps. This activity helps students to break-down algorithmical activities/tasks and then visualize the parts or steps.

Once discussing the lamp example, have students go back to their pairs and work on creating a logic flow diagram on a sheet of paper of a daily task/activity that they regularly perform.

Consolidate:

To connect this to coding, use a pre-made (unfamiliar) scratch activity and have students dissect how the activity 'works' by creating a logic flow diagram of how it functions. Students can initially try to diagram the activity without looking at the code. Once this is done, they can revise their diagram by looking at the code.

Further application:

Use this idea to have students pre-plan their coding. For example, pre-plan a choose your own adventure game using a logic flow diagram:


Monday 27 June 2016

Human coding!

After being in several classes introducing coding via Scratch Jr, I've had some really great success around introducing concepts and ideas first with the students by doing some human coding first. The idea came from: http://www.mrswideen.com/2015/03/teaching-coding-without-computer.html.

The first time I put out a number of objects that acted like obstacles and then the class 'coded' a toy to move through the maze and we used paper Scratch Jr blocks to build and record the algorithm as we went.


In the image above you can see the 'maze' and then in the bottom right, our algorithm that was needed to navigate the toy through the maze. 

I then saw this resource of Vector Scratch Blocks where the blocks had been added to a Smart Notebook file. So I started to use these for the coding of a student navigating from one side of the classroom to the other side. I didn't love that the blocks were not Scratch Jr Blocks. But we made due. 


I have now put the effort into doing the same for Scratch Jr! I hope to use these a bunch next year with the classes that I am going into and am hoping for the best!


Resources:


Sunday 24 January 2016

My Favorite - MTBoS Post #2

For this week's (late) post, I am going to write about peardeck.

Some back history...last year I was a ICT consultant for my school board for 1/2 of the school year. Before entering into this job, I had used some student response systems in my class, namely NearPod. Going back into the classroom in September, I had access to a 2:1 set of chromebooks for my class and I was able to get a paid subscription ($100 USD - which seems really ritzy right now considering the state of the Canadian Dollar).

Using pear deck in the Math class for me has been mostly for formative assessment and to review old(er) concepts and make sure that students are on the same page. For example:

or
or
or

It has been great. Some of the benefits has been:
  • increase in productive student talk
  • increase in students willing to take risks when answering questions (when I display student answers, their names are not shown)
  • ability to quickly identify areas of student confusion and then immediately take it up and clarify
Why peardeck? Well, I am in a GAFE school board and Peardeck is amazing within google drive. Here are the perks in my mind:
  • Peardeck files you create are made in google drive
  • Peardeck results include student name (as made within their GAFE id) - awesome to know who exactly needs more help or drew something innapropriate)
  • ability to display whole class or individual responses
  • TAKEAWAYS!!!!! Students recieve a copy of their own responses to my questions within a google doc. This allows them to review their work and get feedback from me or they can do some reflective self evaluation
  • the ability to drag dots/arrows/numbers/etc - called draggables.

  • ability to draw on other pictures
  • Easy to share via Google Drive's sharing abilities ~ check out #giftadeck on twitter.
I also did some follow-up the other week, and the student feedback was overall very positive around the use and effectiveness of this tool in our math class!


Wednesday 13 January 2016

One Good Thing - MTBoS Post #1


For this week's blog post challenge for the MTBoS challenge, I have chosen the path of "one good thing". The challenge is to: "keep a lookout for the small good moments during your day and blog about them"

At the start of this year I had received money to purchase a year's subscription to pear deck for the use within my classes. Thinking ahead to August, when it expires, I had invited my principal into my classroom to see how it works and what the benefits are for students. I had invited her a couple times and she had been quite busy so she had to cancel. In my head, she was going to be in my class for the first 10 minutes (for the minds-on part) of the lesson - goal: practice identifying the opposite, adjacent and hypotenuse of a right triangle from the day before.
So then I jump into the next part of the lesson. The point at which I expected my principal to leave, the lesson on introducing primary trigonometry ratios. I had done this in the past and it had gone really poorly. I found an "investigation" in the textbook, and I thought, could a geogebra worksheet do this too? I found this:

 ...and I edited it to include more information into this (drag the purple and red sliders to manipulate triangle):


I then tapped my inner science teacher and made a "lab" to guide student inquiry into the primary trig ratios (they were to all pick different values for angle ACB:

Students and my principal went through the investigation. At the very end, students realized that the three last columns were providing the same answered. I then asked students to try pressing "sin (their angle ACB)" then cos and tan for the same angle. The sounds of shock that came out of each student as their calculators matched their values no matter what angle they picked, matched their columns was awesome. Students really felt clear on this initial lesson. That the lesson was not staged for the admin to show-off and that it went so well was a HUGE good thing. Students had a very positive learning experience and understood where the three primary trig ratios came from/what they were based off of. 

And that was a HUGE "One Good Thing"

Monday 28 December 2015

Manipulatives in Math

Before the semester had started, I had stumbled upon Joe Sisco's (@joe_sisco) interactive word walls Google Drawings for Google Drive (Link to complete folder here: http://bit.ly/INTERACTIVE_WORD_WALLS)

I started by using first the Linear Relations drawing and the drawing for Quadratic Functions. As I progressed in the Quadratics units, I kept going back to the "! - Using Algebra Tiles" Google Drawings with both of my MPM2D classes. I used it to launch into many ideas or concepts, or I made my own drawings to quickly illustrate ideas.

It all started when we started to need to expand terms and factor trinomials. I remembered the awesomeness of using algebra tiles with my MFM1P class from long ago. I also remembered how students either rolled their eyes and groaned and then refused to use the tiles because I couldn't really assess them/get them to hand anything in. IN STEPS GOOGLE CLASSROOM!

To start, we practiced modeling trinomial expressions. All I wanted students to do was to review how to visualize the terms in a polynomial expression. Here is what students received:

Using Google Classroom, each student got the above Drawing file. I gave them the verbal instructions to model the expression, using the tiles on the side. The goals of this first sheet were for students to model the expression with algebra tiles, learn how to get and hand-in work within google classroom.

Here are some examples of student work:


 I switched it up in the second activity and gave them the drawing and got them to give me the expression (in standard form):

In the third slide I had students collect like terms and use the "zero pair" principal:

I wish I could say that I am a math genius and that I put the zero pairs concept in there on purpose, but when we got to completing the square much later on, WOW, was I happy that I had introduced this at this point, much earlier.

I finished off with expanding (there was a ton of guidance given in class to pull this off). 

Student work:


Really this was the goal of the lesson, but by doing the algebra tile work on the previous three examples, it really helped later on. Using google classroom was a huge help. Students really focused and knew that they were handing their work in. It added to the "validity" of the activity and my buy-in was huge. I cycled around the classroom and was able to provide feedback on the spot for students who seemed off track. I would finish each manipulative worksheet off by showing off a couple examples and discussing the work. It was a great learning opportunity for all (me included).

BUT it didn't stop there!

I then used the template to make "perfect square" examples and questions for Peardeck. Great to visualize perfect squares and their roots.

First:
Then:

And Finally:


There were a lot of numerical examples too (don't worry).

When we got to completing the square, there were examples of how to complete the square visually, using algebra tiles. So I set-up 4 practice questions using Google Drawings and Google Drive. Note in the question about "Zero-pairs". When I brought this up, it was not a crazy idea or concept due to the work we had done before.

I gave them this (for our first example):

And they made me:

I even went so far as to showing them (not making them do) an example for when "a" is not equal to one. I really enjoyed making it too.

So I was thinking about fractions and some work I had done with helping students in grade 9 with EQAO prep and general math concepts help from some years ago. I had used the Pattern Blocks for visualizing fractions and I started wondering if there was such a thing made on Google Drawings. I couldn't find anything, so I made these:


Link to google drawing file: http://bit.ly/PatternBlocksDrawing

I hope to use them in the future with other teachers within my board, but I'd love to hear how you use them in your class and/or any feedback (I tried really hard to align them properly so they actually work).

Monday 16 November 2015

Progress - two first ideas

Back in the classroom after ict consulting has been great. I have been fortunate to have access throughout the first 1/2 of the semester to a 1/2 class set of Chromebooks and a departmental 1/2 class set of iPads. I am teaching two MPM2D (grade 10 math) classes and one SCH3U (grade 11 chemistry) class. There have been some common uses of the technology and some purposely different.

In the spring last year I met with Dave Kay in the SMCDSB at a school in Barrie. Dave had started a mind mapping unit review with his class for on-going creation and review. I really liked the idea because in SCH3U in the past, students would not do the readings as review. I got the students set up on mindomo because of its gafe affiliation. Now students have adopted it and have made some fantastic maps. I have been able to see how students are conceptualize their understanding of content in chemistry.
Examples of student work:

Sample provided to students (in math):

I was fortunate enough to have a year subscription to peardeck provided for me. To get ready I participated in a couple (awesome) live tours given by peardeck. I have been using peardeck as a formative assessment tool in both math (mosty) and in chemistry. Combined with an interactive white board, I have been able to collect assessment data instantly, discuss misconceptions and review old concepts. In math, this has been AMAZING. Tomorrow I am hoping to use a second device (phone/tablet) as students participate so I can walk around them for more guide on the side vs sage on the stage feedback.

Examples:


Both technologies/softwares allow me the opportunity for some metacognitive thinking aswell. With the mindmaps, students reflect back and review concepts, self identifying key parts of the lesson. With peardeck I ask reflective questions. The formative feedback with peardeck has been amazing. Being able to quickly identify student misconceptions right away has been great. Students enjoy the activities and will also verbally ask follow-up questions within the lesson.